One of the tasks I had was to build the lift shaft. I understand a little of how lifts are built and what sort of structure, such as I knew lifts use a triangular frame on the sides for strength, but I needed more information.
These CG models were very useful as you can see the inner structure clearly. Also, looking at these it seems it would be fairly simple to build.
From these I could make plans on the construction of the laboratory.
This is the underground lab. There are two rooms separated by a removable wall. The lift shaft will be built separately too so that it can be removed if needed for filming. As the scene is underground I decided to use plaster strips to model a cave like, rocky surface. I will also be doing this for the surroundings of the lift shaft.
For the lifts frame I will use wooden modelling strips and glue.The wood strips are very light so it easy to cut and stick together whilst staying rigid.
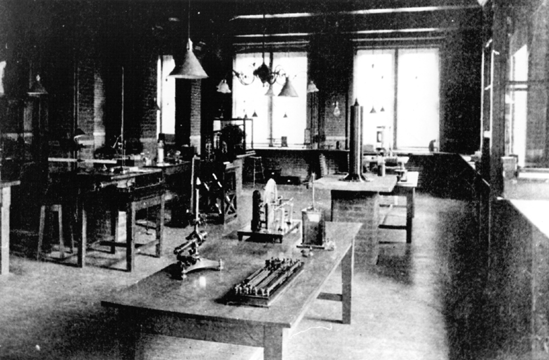
We took a trip to millennium point and were able to take some great photos of old industrial machinery!
This is the completed shaft! The wooden bars have been painted silver and the 'rock face' of its surroundings painted grey for a rocky effect. I also stuck a few old bits of pipe and nails as small details in the rock face.
FILMING AND MOTION CONTROL
This scene is described to follow a cut through of the lift shaft underground, down to the lab. This would be a continuous scene so my first thoughts were to build the lift shaft and using an adjustable table or camera we could move the scene up so it appears to follow it down.
Then we were shown the MILO motion control camera. Matt (technician) showed us what we could achieve with it. Also to have this would look impressive to show in any show reels and other work. We were shown how it could be used for stop motion and I thought this was the best way to achieve the lift scene.
This is a good example of the type of things that can be produced using a motion control camera!
As soon as the shaft and lab was built and the first of the scientists finished I booked the MILO for the next day! We described the shot to the technician and he agreed it was a simple shot but would look effective for what we were trying to achieve!
The scene was set up on a table in front of the camera.
To create a soft, natural light we were advised to use flourescent tubes and a 300watt light, for a daylight effect.
We decided to use the green background, incase we needed to chrome in the dark areas. However we found the set reflected too much of the green on camera. Without it, just using the 2 sets of lights, the effect was great straight away, with no tweaking needed. Thankfully this made things simpler for us later in production.
Once the start, middle and end points of the cameras route were set, we could start capturing the movement frame by frame. The stop motion software we used for this was dragon.
We set to film at 25 frames per second. It is difficult to tell at times if the camera has moved at all (seeing as the movements are so small). However the frame count made it easier to keep track. If a problem occurred, we could set the camera back to the frame we want and continue.
Towards the end the task required two people. One to capture and one to animate the scientist armature upon first sighting him!
As a group we sat and made thumbnail sketches to storyboard how the action should take place, plus the look of the settings. We had done our research, so it was easier to visualise this with the references at hand.
INTRODUCTION
We start off in a mountainous valley surrounded by forests.
The valley points to a shack in the middle.
We see a close up of the shack then fading down to black before revealing the lift shaft.
Follow this down to the bottom where we see the scientist on his radio
We then see a close up of the scientist/ view of the lab
Through the door in front of him we can the second scientist chiselling at a block of ice
He hears a noise and puts his ear to the ice
Eyes open inside the ice/ cracks appear
(OPTIONAL INTRODUCTORY SCENES)
Zoom into the shack
Zoom in through the hole in the roof to reveal the lift from above
Fade to black down lift then switch views of the lift shaft
YETI ESCAPES
We see the scientists from the view of the ice block
Yeti breaks free from the ice
Scientists look up in horror
Screen goes blank and noises of a scuffle and running can be heard
The lab is empty, trashed and emergency alarms are going off.
The lift doors open and the scientists run out
The yeti's hands appear at the top of the lift shaft
The scientists feet show they are running
(OPTIONAL) Live camera scene showing the sky as running through the trees (using a hand held camera).
TASK: In groups create a stop motion animation using a script.
We were given a choice of 3 or 4 scripts. The one my group chose is the story of two scientists working in a lab, in a deserted, mountain area. We follow a cut through of a lift shaft down to see their underground base. Whilst chipping away at an ice block they accidently uncover a yeti inside! The seemingly angry yeti chase them out into the forest before they are cornered by yet more yetis! They turn around in horror as the yeti catches up with them, only to be flung to the side so that the yetis rejoin their lost friend and the scientists look on in amazement!
We all felt this script was very descriptive and we could easily visualise it. In particular it was exciting to think of the possibilities in which to do the lift shaft scene. If we could do that right then we knew that could look impressive!
So to start we divided the roles into two groups. Two worked on the storyboard and settings whilst the others worked on characters and armatures. I worked on the settings. Once our roles were assigned we felt the best way start was to collect references and make drawings of the scenes and objects required.
Aim: Create an armature for your character. Make designs, thinking about and experimenting with proportions, weight and materials.
Q. What is an armature?
A. An armature is a wire skeleton for stop motion characters.
I started using the indian design to create an armature. To give him more stability he is designed as a short stocky character.
This is how the skeleton would look. 15 cm is a good height, as its not too small to sculpt but will have better stability.
Using the basic shapes as the basis for the character will help me to understand how the pieces can be put together.
The basic requirements for the armature are that its stable and this can be achieved by keeping the base heavier than the top. There are different ways to do this and what materials are used will be important.
Aim: Design a character that can be made into a head, using clay. There should be three heads in all, that can be used for replacement animation.
I got myself a magazine for hair styles to generate interesting ideas for a character. I find that this is a good way to start as some of the hair designs can be quite outrageous in everyday life, but different and interesting when it comes to creating characters.
This design was one of them. I thought the clown crossed with the geisha made a very visually interesting character.
As I wanted to create a male character design, I adapted the drawing, to give him a larger, square jaw. I like the design of the hair and gave him a mask also. As its a male character, but with a geisha design, I felt kabuki actors would be good to study as this traditional type of japanese theatre only uses male actors, so sometimes the actors will dress as geisha or other female characters.
I do like the hair design. However, to create multiple heads I think the design would have to be simple so that it can remain consistent, which will be very important when it comes to using replacement as a principle of the animation.
Remembering what Curtis Jobling said (creator of Frankensteins Cat and other animated shows) about using simple shapes to create characters, I tried to creak the character down in this way. This should help me to understand how to put the character together, when it comes to sculpting it.
I experimented with the design, creating a robot like character with the shapes. However I wanted a more natural character as I felt this would be better in creating a more expressive, emotional character.